Practically Perfect: The Cast Iron Skillet

Let’s play a little game: What images come to mind when you read the word “skillet”?
Cowboys heating up their nightly meal in a pan over an open campfire on the high plains? Perhaps a prairie settler serving sizzling bacon to her family in a log cabin? Or maybe it’s a cartoon homeowner thwarting an unwelcome burglar by smashing him in the head with a frying pan.
Those frying pans you envisioned? Odds are they’re all cast-iron skillets.
At one point in our culinary history, there was no need to qualify the word “skillet”; cast iron was ubiquitous, as evidenced by our little game. But with the advent of the space-race era of the 1960s, cast iron fell out of fashion, replaced by new nonstick aluminum pans which were lighter, sleeker and easier to clean. This new cookware, along with other technological advances that followed, has certainly made our modern kitchens more efficient than those of our grandparents. Granny would undoubtedly be impressed with our sous vide chicken breasts and on-demand one-cup coffee machines.
However, as with bell-bottom jeans and shag carpeting, what’s old has become new again: Cast-iron cookware is experiencing a resurgence in popularity. Along with a renewed appreciation and passion for our grandparents’ less processed way of living (think canning and preserving, victory gardens and “Paleo” diets), many of us are also embracing the tools with which our grandparents cooked, including that workhorse of the kitchen, the cast-iron skillet.
As their name imports, cast-iron skillets are composed of iron. More specifically, they’re made from a mixture of iron and steel, heated to a high enough temperature to liquefy and then poured into a two-sided sand mold in a process called casting. Once cooled, the mold is broken open and the skillet is removed in one solid piece.
While this one-piece construction imparts strength and durability, cast iron has many other advantages as well. It is capable of withstanding extremely high temperatures while absorbing, distributing and maintaining heat evenly, making it ideal not only for frying but also for high-temperature searing and even baking or roasting. Plus, it’s equally at home over an open campfire, on the stovetop, in the oven or on an outdoor barbecue grill.
The secret to getting the best performance from a cast-iron skillet lies in the seasoning process (see sidebar for one recommended technique). Seasoning means baking on light coats of oil that not only protect the skillet’s surface but also fill in miniscule pits and cracks; it’s akin to keeping a good coat of wax on wood furniture or moisturizing your skin in winter. Each time the pan is used, a little more oil is baked on, further smoothing the surface and helping to give it its famous low-stick quality.
Another advantage is that the skillet is easy to clean. Once properly seasoned, it requires only a light cleaning with mild soap and water to remove leftover cooking oils. In fact, some advocate not using soap at all but instead simply scouring off excess oil with hot water and a scrub brush or a handful of salt. Perhaps this no-cleaning approach is why the skillet has been a staple at hunting and fishing camps. Regardless, there’s certainly no soaking required or even advised; soaking or running a cast-iron skillet through a dishwasher will remove too much of the essential seasoning layer.
So keep the cleaning procedure simple: After using the skillet, let it cool, swish it with mild soap and water, then dry it thoroughly with a towel. Place the pan back on the stove over low heat for a minute to help any remaining water evaporate, then re-season by lightly wiping the surface with a little food-grade oil soaked into a paper towel or soft cloth. Let the pan continue to sit on the heat for another minute or two, remove it from the heat, carefully wipe out any excess oil, cool it and store it in a dry place.
In the interest of balanced reporting, I now have to tell you that the cast-iron skillet is only nearly perfect. Its sturdy iron construction comes with a price: Cast iron is heavy. For those with carpal tunnel syndrome or who like to cook in oversized pans, a larger-sized cast-iron skillet may be challenging to lift and manipulate easily.
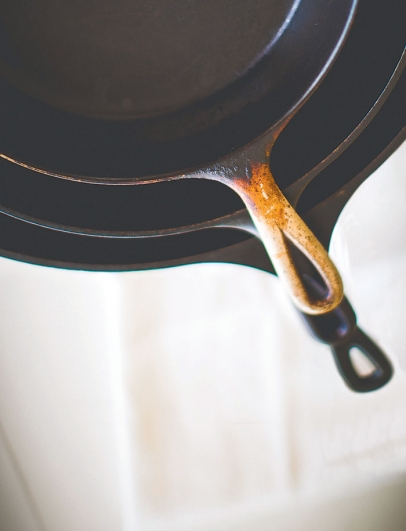
And while the iron provides much-lauded strength and durability, it can also be prone to rusting if not well maintained. Whether your newer cast-iron skillet has gotten wet and developed a few rust spots or you’ve scored a thoroughly rusty antique skillet at an estate sale, you must remove all the rust with some sturdy steel wool, followed by a repeat of the seasoning process. Using the skillet regularly, re-seasoning it and keeping it dry will keep the rust at bay.
Put off by all this talk of careful maintenance? Consider instead an enameled cast iron skillet. The skillet is still one-piece cast iron but is finished with a baked-on glass enamel coating that removes much of the maintenance onus. Although it lacks the fabled non- or low-stick quality of well-seasoned bare cast iron, enameled cast iron doesn’t require seasoning, won’t rust, can be soaked for cleaning baked-on messes and comes in a variety of colors.
Whether you’re the proud owner of a family heirloom passed down for generations or simply in the market for some new cookware, you can’t go wrong with a cast-iron skillet. Albeit less than carefree, a cast-iron skillet is extremely durable, virtually indestructible and capable of handling almost any cooking task, both indoors and out. Properly used and maintained, your skillet will last a lifetime—perhaps even several others’ lifetimes.
Practically perfect, it’s the little black dress of cookware.
SEASONING CAST IRON
To season a new or newly de-rusted skillet, preheat oven to 400° as you wash the skillet with mild soap and water. Dry it thoroughly, then place the skillet in the oven for a few minutes to ensure no water remains.
Remove the skillet from the oven and lightly rub the entire interior surface with a food-grade oil (vegetable or canola are good choices) poured onto a soft cloth or paper towel. Place the skillet back in the oven and let the oil bake in for about an hour.
Remove the skillet from the oven and carefully wipe out any excess oil. Cool completely and store in a dry place. Follow the stovetop re-seasoning process (described in article) after each use and cleaning.


